Overview
____________________________________
How to configure the DNS settings in your Windows 10 operating system. The aim is to direct DNS traffic from your network to the OpenDNS global network. This article briefly covers the points below.
- Accessing the Network settings
- Turning off the Automatic DNS configured by your ISP.
- Configure the OpenDNS IPv4 addresses.
How to Solve
____________________________________
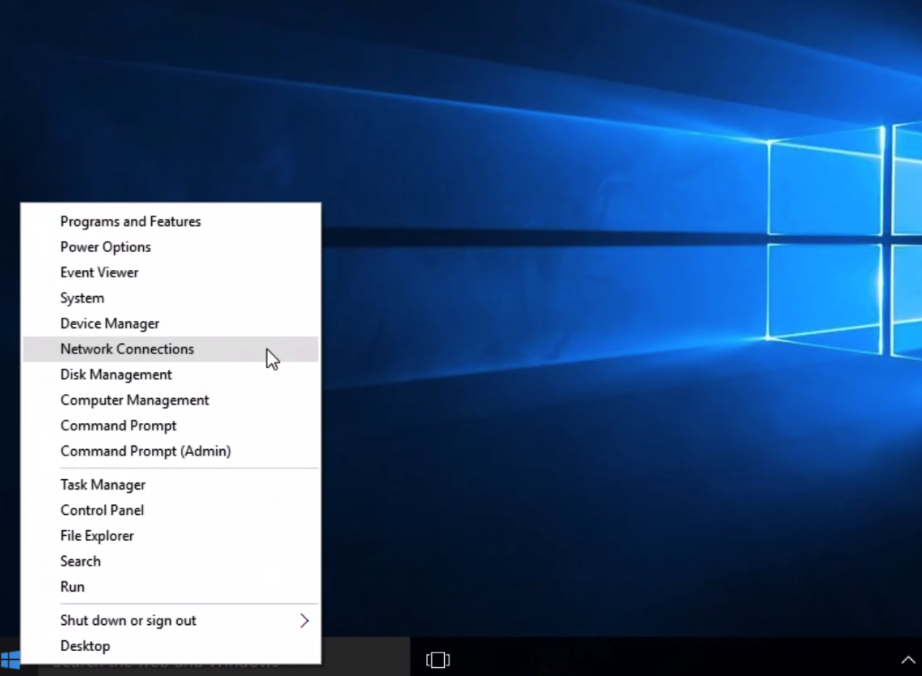
1. Right click the Start menu and select Network Connections.
 |
| Windows 10 |
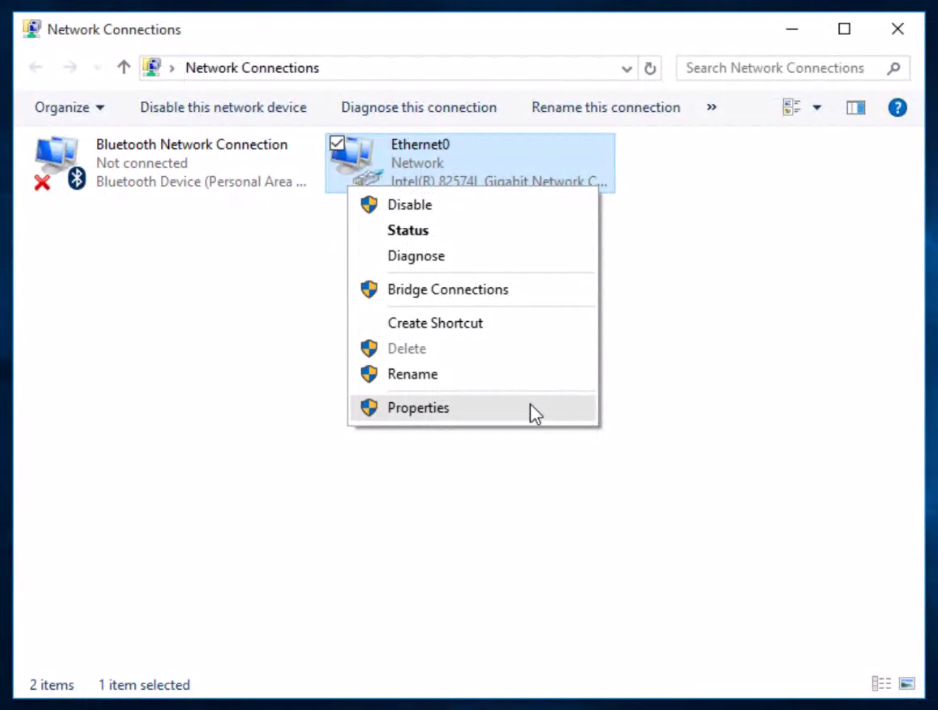
2. Right click the network connection you're using and select Properties.
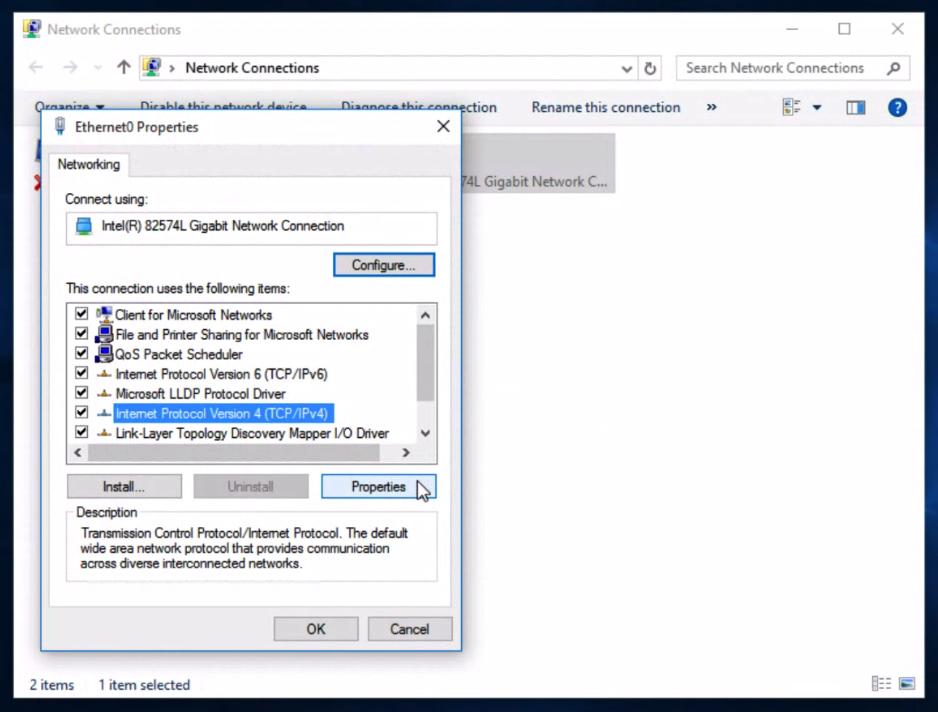
3. Highlight 'Internet Protocol Version 4 (TCP/IPv4)' and click Properties.
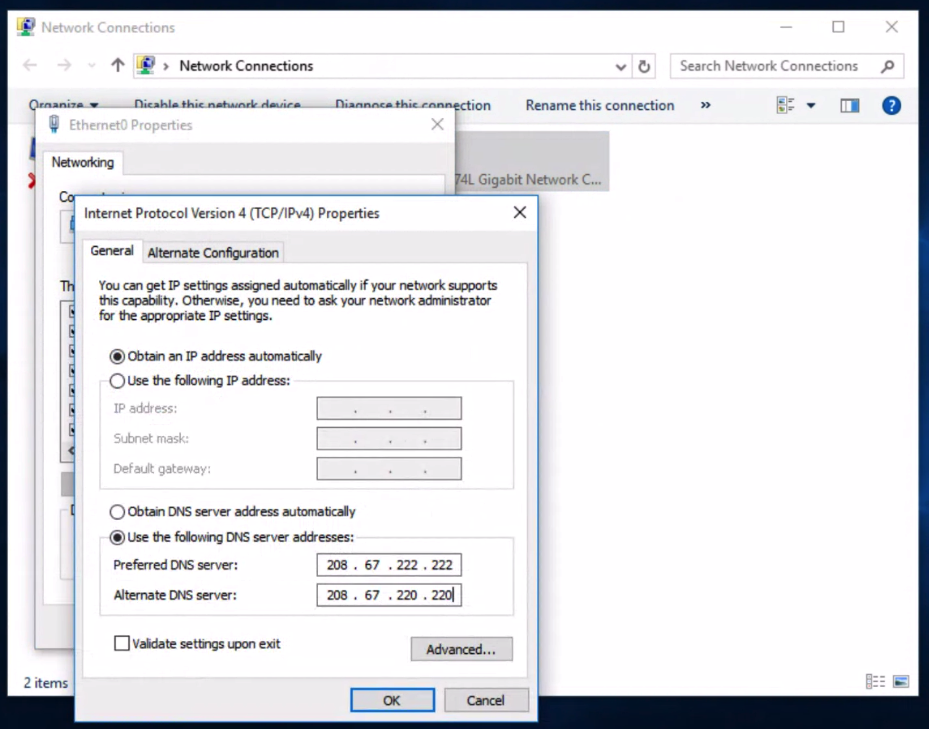
4. Select Use the following DNS server addresses and type OpenDNS' addresses (208.67.222.222 and 208.67.220.220) in the Preferred DNS server and Alternate DNS server fields.
5. Click OK, then Close, then Close again. Finally, close the Network Connections window.
6. Flush your DNS. At this point, I recommend that you flush both your DNS resolver cache and your web browser's cache. This ensures that your new DNS configuration settings take effect immediately.
______________________________________________________________________________
By: Hemant Gupta
Contact: +91 9116866718
Comments
Post a Comment